Make Your Own Recipe Book | Photobox
By Photobox on 28 February 2020

Remember Grandma’s peach upside down cake? Or Uncle John’s squash and feta pie? What about the kids’ questionable chocolate cookies? Nothing brings people together quite like food, so why not start taking note of all those delicious dishes and create your own family recipe photo book. Lacking on inspiration? Chuck in those Saturday Kitchen favourites too, we won’t tell.
Here are our six top tips to help create the perfect family cookbook:
1. Gather your recipes
A recipe book isn’t complete without, well, recipes. So, dig out all those old family favourites, the ones you’ve pinched from friends at dinner parties, and the ones you’ve seen Nigella master and passed off as your own invention. Your personalised recipe book should be filled with dishes that are your absolute favourites to eat but also to cook. It doesn’t matter where they’ve come from, the main thing is that they taste good!

2. Pick a theme
Christmas Classics, Family Favourites, Delicious Desserts – the list goes on. Select a theme that links all those scrummy recipes together so that you know exactly what you’re getting when you reach for that book. Are you an Italian cuisine fanatic or do you prefer French cooking? Either pick a specific theme or bundle your favourite recipes together to make an ultimate personalised cookbook.
If you’re giving it as a gift, choose a theme that’s relevant to that specific person. For example, if your best friend is moving into their first home, why not create a unique recipe book full of all their favourite foods? Or is your youngest going away to university? Create a personalised recipe book that has super easy and affordable meals they can make with the things in their cupboards. That way they’ll get to take a piece of home with them, and you can rest assured that at least they’ll be eating something other than cheesy pasta and late-night kebabs!
3. Plan your book
Whether you want to kick things off with a Starters section, or you want to have a section for each contributor, it’s a good idea to have an order so that you know exactly where to find your favourites. Don’t go mixing your crème brûlée with your caesar salad, this recipe book is fully customisable, so you’re able to organise all your recipes from starters to desserts. When planning your personalised recipe book, you could go down the traditional route with a Starters, Mains, Desserts order. Or, categorise by ingredients – Veg, Meat, Sweets and so on. Another idea is to follow the seasons – have a section full of summer specials and one for all those winter warmers. Or go arty and unique by categorising the recipes by colours of the rainbow, from rich red beetroot salads to the purple hues of a black forest gateau. The possibilities are endless when creating a personalised cookbook and half the fun is the planning.
4. Ready, set, COOK!
Now you’ve got all your recipes sorted, you’ll need some photography to go alongside them. Don’t just dig out any old snaps of these delicious dishes, get cooking.
Recipe books are always better with pictures of the delicious ingredients or the finished product. Now don’t panic, we’re not asking you to go full on Joe Wicks and prep every meal for a photoshoot (unless you want to, of course). Whilst making your tasty dishes, take a quick snap of the pan bubbling on the stove or the finished product to add to your personalised recipe book.
If you’re really a perfectionist, or you’re making this personalised recipe book as a gift, you can shoot every meal in the same way to add a sense of consistency to the book. The same angle, same lighting, it’ll make your photos flow like they’re telling a story. The best part of this step? You get to try all your favourite foods over and over again.
5. Get creative
So, you’ve got all your recipes at the ready, your photographs are stacked high, almost filling your camera roll (yes, you can create a photo book right from your mobile phone – want to know how? Follow this easy guide) and you’re ready to go. But where to start? That’s the best part. it’s up to you. However if you’re stuck on which direction to go in, we’ve got you covered. Start by organising your photos in the theme you’ve chosen, you could even edit them to make them look extra professional. You can customise the size and placement of all your photos, how many you’d like per page, and what order they come in – tell your culinary story the way you want. Plus, you can select the font size and colour to create something truly unique.
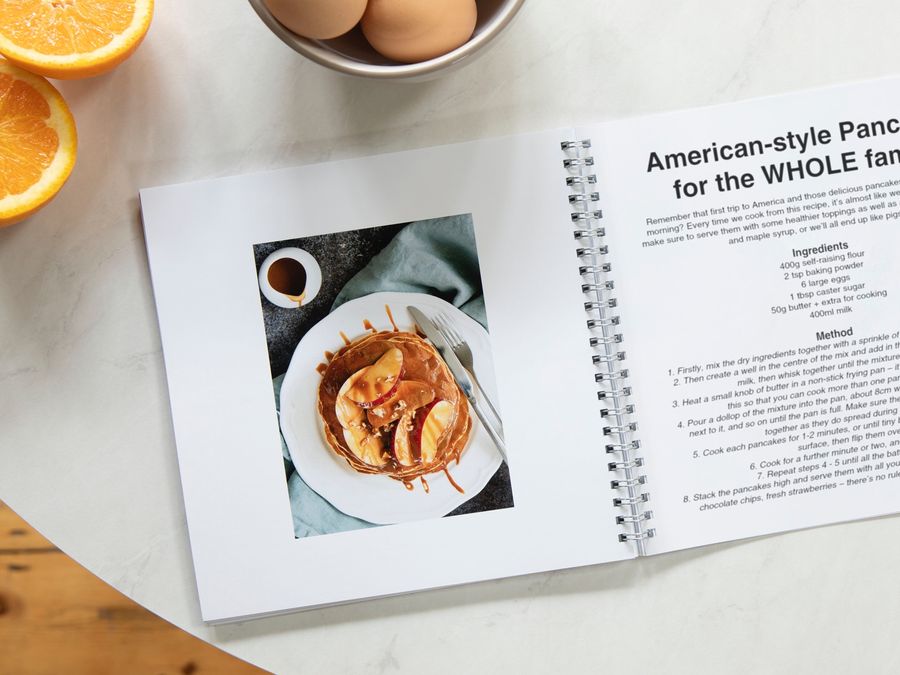
Want to make it seem more personal? Choose a handwritten font to give it a homemade feel. Almost like your personalised recipe book has been passed down for generations. Gone for a book of Scandi classics? Select a modern sans-serif font to give it a clean and simple look. We’ve chosen to use a Square Spiral Softcover Photo Book so that the pages can lay flat, making it easy to read. We’ve also chosen a glossy finish – perfect to wipe clean for all those unavoidable splashes and spills.
Need a little help adding in your recipes? This handy blog post is full of little hints and tips about adding text to photo books that’ll get you creating in no time!
6. Made for sharing
Just like the food, your recipe book is made for sharing (Unless sharing food isn’t your thing, we completely understand). Write your own recipe book into your family’s daily cooking routines and make yummy meals with it whilst marveling at your handy photography skills. Whether you give it as a gift, or keep it in the family, the meals you cook from it are sure to be extra special.
Want even more hacks on how to create the perfect personalised photo book? Check out our photo book creation guide and visit our photo books range page.
